Dry Film Thickness Based on SSPC-PA 2
The Paint dry film thickness measurement is addressed on SSPC-PA 2 and provides information to how to average the readings and determine DFT acceptability. Let's start with an example, you review the customer coating specification and see that requirements for DFT 9-12 mil. The specification indicated 3 layers coat and each layer with DFT (3 to 4 mil).
The I4I Academy API Source Inspection Fixed Equipment Course covers the requirements for dry film thickness. The API 571 Corrosion and Material course includes the damages caused by coating and lining in refineries and petrochemical plants. ( API Recommended Practice 571, Damage Mechanisms Affecting Fixed Equipment in the Refining Industry)
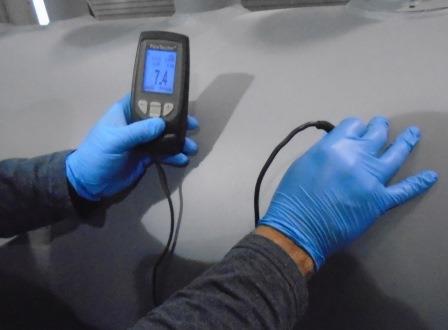
You are witnessing a dry film thickness measurement on final coat, and it is supposed to be 9 to 12 mils. You are using a calibrated electronic gage and taking readings. You are getting the numbers from 5 to the 15 mil in different places. So what is your final DFT? should you reject a test point that its thickness is way below the minimum amount?

The SSPC-PA 2 outlines a test procedure based on following definitions:
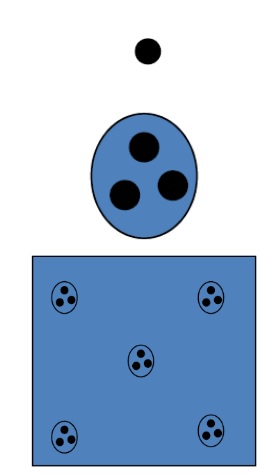
Gage Reading: It is the single reading, the point you place the instrument probe.
Spot Measurement: It is the average of 3 gage reading within a circle of 1.5 inch
Area Measurement: The average of 5 spots in each 100 square ft.
Expect to get different gage reading even if they are even too close to each other. This happens because of the surface irregularities. Start with considering an area about 100 square ft and then select a spot, assume a circle with a diameter of 1.5 inch and take 3 gage readings.
As per SSPC-PA 2, a single reading does not matter and is not considered as acceptance criteria. In above example, you can have a gage reading for 3 mil or 5 mil and with these gage reading the paint is not going to be rejected. The standard also goes higher than this and says, the unusual very low amount can be ignored from recording and calculation.
Spot reading shall be within 80% to 120% of specified values. In above example, the 80% of 9 mil will be 7.2 mil and 120 % of 12 will be 14.4 mil. So the average of 3 readings (within a circle of 1.5 inch) should be within 7.2 thru 14.4.

You need to take 5 spots and each with 3 gage readings so that the total readings will be 15 gage readings. After completion, you should average these 5 spots, and the average should be within the acceptance criteria it means 9 thru 12 mils.
So actually you have two concessions here, first single gage reading does not matter, even unusual very low gage reading can be eliminated from averaging. Second, you have wider acceptance range for spot reading it mean 80% to 120%. However, your 5 spots average should be within specified range.
Let's continue with above example, you proceed with dry film thickness readings, and you get following values:
Spot 1; 10, 15, 6.5 - Ave. 10.5 Ok., since within 7.2 to 14.4
Spot 2; 18, 12, 8 - Ave. 12.6 Ok., since within 7.2 to 14.4
Spot 3; 8, 9, 6 - Ave. 7.6 Ok., since within 7.2 to 14.4
Spot 4; 6, 8, 8 - Ave. 7.3 Ok., since within 7.2 to 14.4
Spot 5; 12, 14, 17 -Ave. 14.3 Ok., since within 7.2 to 14.4
The spots are Ok, now let calculate the average of these 5 spots which will represent this 100 square ft.
Ave of 10.5, 12.6, 7.6, 7.3, and 14.3 is 10.46, and this value falls within 9 to 12 mil, so the DFT in this 100 square ft is OK, it would have been rejected if it was less than 9 or higher than 12 mil.
What should be done if it was less than 9 mil? Another coat should be applied to reach the required DFT value, and measurement should be repeated.
What should be done if it was higher than 12? That depends on the coating specification if permitted by coating specification, then should be subjected to the sanding (by sand paper) to reduce paint DFT, if not indicated in the coating specification, then the painting manufacturer should be consulted. Some paint manufacturers do not advise the sanding and instruct re-blasting and repeating the coating process.
Dry Film Thickness Instrument Calibration

The electronic gage should be calibrated by gage manufacturer, or authorized agent and certificate of calibration should be traceable to the National Institute of Standard Technology (NIST).
Dry Film Thickness Instrument Adjustment
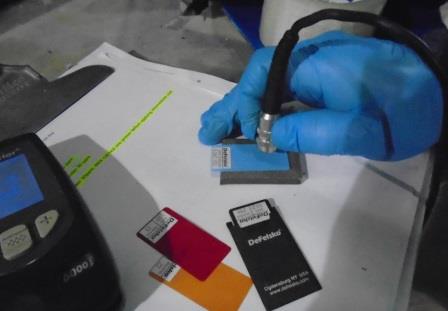
The adjustment should be performed just before measurement and should be performed as per manufacturer instruction. Normally is done through verification by plastic shims. These shims come with the instrument. The shims are available in different thickness. You should pick a shim which its thickness is most close to the specified range in the specification.
Free newsletter!
Sign up to receive my monthly newsletter covering all the latest courses and updates.


New! Comments
Have your say about what you just read! Leave me a comment in the box below.