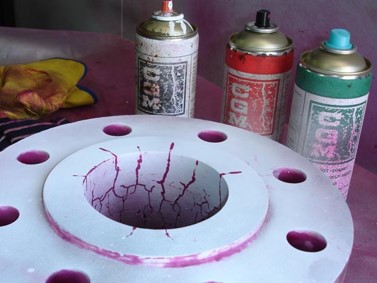
Dye Penetrant Test For Valves
The Dye penetrant test
for valves is required by ASME B16.34 ( Valves-Flanged, Threaded and Welding
End). This standard requires that all exterior and internal surface of the
valve body, bonnet, and cover made by casting or forging to be subjected to dye
penetrant test.

This requirement applies to special class valves and includes material group 1 (carbon steel and low alloy steel), group 2 (high alloy steel such as stainless steel) and group 3 (mostly nickel alloy). However, material group 1 can be done by magnetic particle testing alternatively.
Dye Penetrant Test for Valves And Required Procedure
The test procedure should be prepared and approved based on requirements of the ASTM E165. This is typically done by an ASNT Level III specialist. The test procedure is drafted based on valve manufacture liquid penetrant testing facility or outsourcing to a PT test lab.
Dye Penetrant Test for Valves Acceptance Criteria
After completion of the test based on approved procedure, the surface is subjected to interpretation by a qualified ASNT Level II or Level III liquid penetrant testing specialist. The acceptance criteria is addressed in the ASME B16.34 Appendix III. As per this appendix, the indications divided into the two groups of linear and rounded as follow:
Casting
Linear indication - depends on the valve body or bonnet thickness. For thickness up to 0.5 inch, the max allowed linear indication is 0.3 inch, if the thickness is between 0.5 to 1.0 inch then max allowed is 0.5 inch and if the thickness is over 1 inch then max allowed is 0.7 inch.
Rounded Indication
0.3 inch (diameter of the rounded indication) for thickness up to 0.5 inch
0.5 inch (diameter of the rounded indication) for thickness over 0.5 inch
These above-mentioned acceptance criteria is for individual indication, and if they clustered or had the short distance to each other, then stricter criteria will be applied.
The acceptance criteria for forging is similar to casting, but they have the stringent requirement. For instance, max allowed linear indication for valve body up to 0.5 inch is 0.2 inch
Return to Inspection 4 Industry Home
Free newsletter!
Sign up to receive my monthly newsletter covering all the latest courses and updates.


New! Comments
Have your say about what you just read! Leave me a comment in the box below.