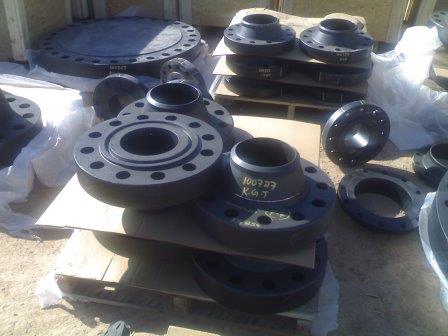
Flange Inspection and Test Plan
This content provides you with a template Flange Inspection and Test Plan. The flange ITP must be prepared based on your purchase order specification and must meet construction code requirements.

| Flange Inspection and Test Plan Task | Vendor | TPI Inspection | Client |
|---|---|---|---|
| Mill test reports(incl.heat treatment records,etc) | H | R | R |
| Non-destructive testing (UT, MT or PT), if applicable | H | S/R | R |
| Heat treatment execution, if specified | H | W | R |
| Metallographic examination, if applicable | H | W | R |
| Visual and dimensional and thickness control | H | H | R |
| Stamping, marking and color coding check | H | W | R |
| Final visual inspection including packaging and quantity control | H | H | R |
| Documentation review prior to release(Final activity of Technical Inspection) | H | H | R |
| Pre-shipment Inspection | H | H | H |
Flange Inspection and Test Plan - Points
H: Hold Point implies that relevant production activities shall not proceed until the continuation of work is permitted by Purchaser. (Notification req'd)
W: Witness point implies that Purchaser intends to witness the designated inspection feature. If Purchaser decides not to witness the relevant feature, production can proceed without permission of Purchaser. (Notification req'd)
S: Witness point, but spot check basis. Initial operation will be witness point and subsequent operation will be witnessed at discretion of Purchaser considering the results of previous inspection. (Random inspection : Notification not req'd)
R: Review inspection & test records (Notification not req'd)
This is a template flange ITP, you need review your specified manufacturing code and your purchase order specification and then modify above ITP.
It is good you add 3 more coulmns in above ITP, one to determine your specified construction standard, second one to specify your acceptance criteria and the third one to identify required verifing documents.
verifing documents are: test proceduers, test records, quality control plan, inspection notifications, release note, etc.
You can use also following table to change above flange inspection and test plan to be fit in your purchase order:
| Flange Material | Class | Size | Inspection Grade |
|---|---|---|---|
| Carbon Steel Flange | <1500 | ≤10" | D |
| Carbon Steel Flange | ≥1500 | >10" | C |
| Carbon Steel Flange | <1500 | ≤10" | C |
| Carbon Steel Flange | ≥1500 | >10" | B |
| Low alloy & Stainless Steel Flange | <1500 | ≤10" | C |
| Low alloy & Stainless Steel Flange | ≥1500 | >10" | B |
| Low alloy & Stainless Steel Flange | <1500 | ≤10" | B |
| Low alloy & Stainless Steel Flange | ≥1500 | >10" | A |
| Special Flange | <1500 | ≤10" | B |
| Special Flange | ≥1500 | >10" | B |
| Special Flange | <1500 | ≤10" | A |
| Special Flange | ≥1500 | >10" | A |
Class A: Mandatory Involvement during the fabrication; 60 to 100% checking of parts forming the batch to be inspected (minimum one piece)
Class B: Optional involvement during the fabrication; 25% to 60% checking of parts forming the batch to be inspected. (minimum one piece)
Class C: 10 to 25% random inspection of the parts forming the batch for which the definition is given by the standard of the product (minimum one piece)
Class D: 0 to 10% random inspection of the parts forming the batch for which the definition is given by the standard of the product (minimum one piece)
NOTE: The Extent of Inspection Depends on Order's Quantity, Vendor QC Evaluation at Job Stage and/or any nonconformity is raised during inspection
Most of flange purchasers buy flanges that have already been manufactured and there is no chance to witness above inspection and tests. In this case, your TPI must pay more attention to the review of quality control records and test reports. The test reports must be checked against specified construction code.
Free newsletter!
Sign up to receive my monthly newsletter covering all the latest courses and updates.


New! Comments
Have your say about what you just read! Leave me a comment in the box below.